In this post, we are going to setup C/C++ development environment by using Visual Studio on Windows OS. This post will also help you all to setup Rust development environment on Windows which I will share later.
Tools Required
-
Install the latest appropriate Visual Studio 2019 Installer.
-
Install Visual Studio Code ( lightweight editor which we can use for writing C/C++ & other languages code)
Steps
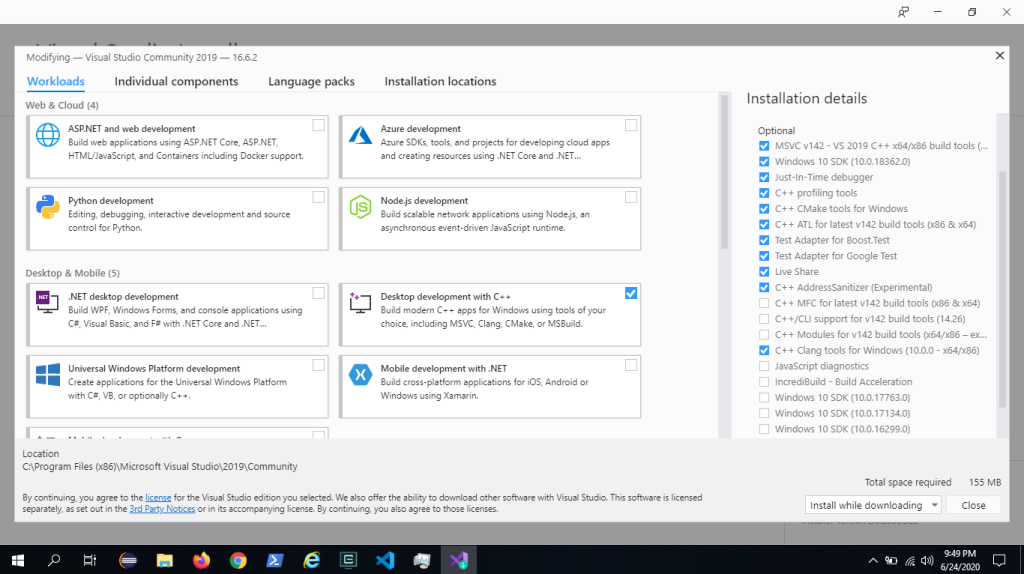
1. Launch Visual Studio Installer & it will launch a dialog showing the Build Tool Workloads. Check the Desktop development with C++ workload (as shown in screenshot below) and then click on Install . I have also installed C++ Clang tools for Windows.
2. It might take a while to install all the selected tools depending your internet speed and your system. You might have to restart your system for the complete setup.
3. Click on Windows Start Menu & then type Developer and you should see the following screen ( as shown below). Click on Developer Command Prompt for VS 2019 ( depending upon your version) and launch it.

4. After launching the Developer Command Prompt for VS 2019 , we can test the installation of Microsoft Optimizing C/C++ Compiler , cl.exe by running the command cl (as shown in screenshot)

5. If everything is installed properly, then the cl command will show you the Microsoft C/C++ compiler message & version.
6. We have to use cl command ( cl.exe ) to compile & build C/C++ files which I will share in next tutorial. We will use lightweight text editor Visual Studio Code for the next tutorial ( it is different from Visual Studio IDE ).
Note : Rust compiler needs Visual Studio C/C++ Build Tools linker to compile the files on Windows OS.
I hope this post will be useful to you all who wants to setup C/C++ and Rust development environment on Windows OS.
References :
- https://code.visualstudio.com/docs/cpp/config-msvc
- https://www.40tude.fr/how-to-compile-cpp-code-with-vscode-cl/